Making a Mimic Trinket Box

Making a Mimic Trinket Box
Inspired by posts on various social media platforms, I decided to try my hand at crafting a trinket box that looks like a mimic from the Dungeons and Dragons role playing game. I don't do a lot of sculpting and I'm definitely not the best at crafts but I really wanted to make a DIY analog of this classic D&D monster.
 |
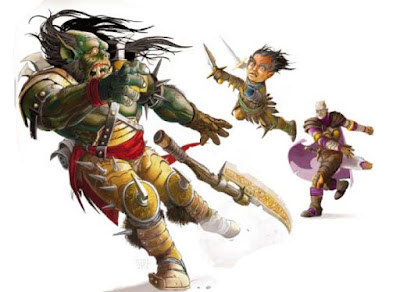
| The Mimic Source: The Monster Manual |
Like many others, I started with a pre-fabricated box. I picked up mine from Michael's for around $1.00. This was the most important step in my artistic endeavor and I failed to put any thought into it. What I didn't consider at the time was how the box's shape would force certain design decisions later on. For example, with a typical "treasure chest" the lid sits on top of the base and has its own sides. For the box I purchased, the lid is inset. While the design makes for a nice box, it pulled me away from the classic mimic form and changed how I sculpted that form. Live and learn.
 |
| The Lid is Inset, Forcing a Different Design |
While a mimic can be anything, including the nightmarish scenario of a ship at sea, the creature is typically represented as a treasure chest. Your archetypal treasure chest is usually made of boards fastened to a frame and held tight with metal bands. My box had smooth sides. Instead of trying to carve it so that it looked like it was made of boards, I opted instead to affix wooden coffee stirrers (manufactured by LaMi) to it using clear Elmer's glue. They were the perfect width. They cut easily. They also readily accepted paint. The overall result worked well, especially after sanding down their edges with an emery board.
 |
| Gluing Coffee Stirrers to My Box |
With this foundation in place, it was time to start the sculpt. I used Sculpey mostly because it's what I know. What parent hasn't done a project or two with their kids using this polymer? It's pretty great stuff and it's available just about everywhere. My original plan was to use it for both the monster portion of the box and the iron bands. Sculpting the bands and getting them to adhere to the wood turned out to be more difficult than it was worth. Instead, I decided to focus on the part of the box that would be the monster. I roughed in the basic shape for the lid, including five eyestalks.
 |
| I First Sculpted the Lid |
The next step was to add in some texture. I wanted to include some bony growths as well. The result was pretty neat but not really what I was going for. The growths ended up looking more like warts. Still though, it didn't look half bad.
 |
| Added Protrusions |
The next step was to add the mouth. I mean, this was going to be a mimic! It needed to have a mouth full of teeth ready to chomp on its victims. Ultimately, I wanted it to look like the creature was opening its mouth when you open the lid. This meant that its top teeth had to be affixed to the lid while its bottom teeth had to be affixed to the base. The general shape of the box constrained what was feasible. First, I had to build out a lip for the lid so that I would have something to mount the teeth into.
 |
| I Added the Upper Lip and Made the Teeth |
The above picture shows both the upper lip and the teeth. I used InstaMorph (moldable plastic) to make those teeth. My wife and I bought some of this years ago after watching an episode of the SyFy Channel's Face Off. This stuff is great because it softens in warm water so that you can mold it with your hands. It then hardens as it cools. It does take a little getting used to. Once you get the hang of it, though, it works like a charm.
With the upper lip complete, I added the rest of the mouth to the base. I wanted my new box monster to have its mouth wide open and ready to eat anyone silly enough to wander near it. This meant adding a lower lip to the side of the box to simulate a mouth. Since I planned on mounting teeth into the lower lip just as I planned for the upper lip, the sculpt required a certain shape and depth. I also wanted to keep that feeling of the front being made of wooden boards. While this was easy enough to accomplish, it took a little planning and some trial-and-error to get right.
I knew I would eventually have to bake the Sculpey to harden it. Once hardened, I wouldn't be able to insert the teeth. That meant I had to insert them now. But I was concerned they would soften in the oven if I left them in place. I decided to place the teeth and then take them out. This left cavities in the Sculpey where I could replace the teeth after baking.
This left the eyes. As I mentioned before, I sculpted five eyestalks. I considered sculpting the eyes as well but I just wasn't feeling it. I wanted more muchness for my new friend. I settled on googly eyes (from Dollar Tree) instead. This completely changed the entire vibe of the mimic but I didn't care. I loved the idea. I still do. It came out perfectly and does match my gnomish personality.
 |
| Sculpt with Teeth and Eyes in Place |
At this point, I did some cleanup work on the sculpt. I wanted to etch in some more textures and rework some of the "warts." When I was satisfied, I removed the eyes and teeth. And then, into the oven my creation went.
 |
| Time to Get Baked |
I had two concerns regarding this step. First, I wasn't sure what was going to happen with the Elmer's glue. Luckily, the answer was nothing. Second, I was a little concerned about the Sculpey shrinking and pulling away from the box. This also turned out not to be a problem...mostly. While the Sculpey didn't shrink it did lose some of its grip to the box. This became more apparent as I moved onto painting. With all the handling needed to paint the box, the top came off entirely. This was easily resolved with some more glue. So...mischief managed. But still...oops.
For my creation, I wanted to use the colors presented in the 5e Monster Manual. This meant a purple mouth (and purple lips). Since this was a treasure chest mimic, its body would be brown. I mentioned earlier that I wanted to include the "metal" bands that most chests seem to have. These I built out of those wooden coffee stirrers after baking the box. I applied a green base coat to them. I used Apple Barrel's Royal Violet, CeramCoat's Burnt Umber, and Apple Barrel's Kelly Green respectively. The result was, understandably, a bit weird looking, but this was only the base coat.
 |
| Base Colors |
Next, I applied the final colors and brushed in a few extra details. It was the exact same kind of work I do when painting miniatures. Ultimately, I used Craft Smart's Brown, Craft Smart's Burgandy, and CeramCoat's Bambi Brown for the wooden surfaces and to accent the eye sockets. I used Apple Barrel's Ivory, Harvest Orange, and Bright Yellow for the bumpy bits on the lid. I used Apple Barrel's Ivory and CeramCoat's Burnt Umber for the teeth. I used Apple Barrel's Mountain Blue and Neon Blue to accent the lips and mouth. And I used Folk Art's Sterling Silver, Folk Art's Metallic Solid Bronze, and Apple Barrel's Pavement for the metal bands.
Once the painting was complete, it was time to reattached the eyes and teeth. The eyes, of course, were easy enough to replace.
 |
| My Mimic Friend...Sans Teeth |
The teeth, however, presented a problem. Since I had hand-molded them, each had left a cavity in the Sculpey perfect for it and not so perfect for any of the others. When I removed the teeth, I removed them from top-to-bottom, left to right, placing them on my work board in that exact order. But life happens and I was doing this project at the kitchen table. I eventually had to move everything to make room for what folks normally do at kitchen tables. The teeth got scattered in the process. When it came time to re-insert them, I found myself in a bit of a guessing game. Luckily, I had molded many more teeth than I had needed which meant I had a wide assortment of teeth to try. Unfortunately, Sculpey can become a little brittle after it's baked. Some of the thinner pieces broke while trying to fit the teeth. I glued back on the bits I could. The others I had to leave behind. These difficulties aside, I was able to find a tooth for every cavity and still be able to open and close the lid with no difficulty.
Lastly, I did a little more touch-up work on the paint. I also tried using the clear Elmer's glue to simulate saliva. I don't know how I feel about the results. Regardless, my new mimic buddy was done with these final touches! I decided to call him Sculpey. Here he is.
 |
| Introducing...Sculpey the Mimic!!! |
He looks great on the mantel.
 |
| Mimic on the Shelf The New Christmas Gift for Kids Be Good...Or Else |
Well, that's the story of how I made my mimic trinket box. There are definitely things I would do differently if I were to make another. I'd certainly use a different box. But you know what? Given I don't normally work with Sculpey, this guy came out pretty darn well. He makes me smile every time I see him. I hope he makes you smile too.
Cheers.
--------------------------------------------------------------------------------------
Follow me on one of these fine social media platforms:
Instagram: @hokumsean
Spotify: @hokumsean
Twitch: @hokumsean
Twitter: @hokumsean
Tumblr @hokumsean
Stop by my YouTube channel "Ovens and Dragons" and partake in the exciting world of cooking for gamers.
Also, check out my DMsGuild offerings:
- Epic Gnomish Inventing
Rules supplement for creating gadgets. - Gnome Concept Packages 1
Collection of gnome-related backgrounds, feats, magic items, and more. - Great House Servants
Collection of backgrounds centered on the servants of a great house. - Mildew's Revenge
A first-level adventure. - Random Plot Generator
A tool for creating adventure prompts for one-shots and story arcs. - The WhatNot Shop’s Absurd Accoutrements
A collection of unusual magical items. - The WhatNot Shop's Bracing Beverages
A collection of strange potions. - The WhatNot Shop's Common Curiosities and Trivial Trinkets
A collection of common magic items and trinkets. - The WhatNot Shop's Dastardly Doodads and Orc Oddities
A collection of orc-themed common magic items and trinkets.

Comments
Post a Comment